Solar-powered lights are undoubtedly a convenient means to obtain light from the sun and transform it into energy you’ll utilize to operate a light bulb. Indeed, one of the perks of using solar lighting in your place is that it doesn’t call for high maintenance. Hence, installing them won’t be burdensome on your part.
Nonetheless, one of the things you need to prioritize is ensuring that your solar-powered lights are neat and well-kept. To do so, you need to know how to clean solar lights. In this guide, we’ll provide you with some step-by-step instructions on how to clean solar panels on garden lights.
Table of Contents
- What are the Materials Needed When Cleaning Solar Lights
- How to Clean Solar Lights
- Cleaning Solar Lights with Vinegar
- Is Regular Cleaning and Maintenance for Solar Lights Essential
- Additional Steps to Take to Reduce Solar Lights Maintenance
- What Do You Need to Clean and Maintain When Installing Solar Lights
- Conclusion
What are the Materials Needed When Cleaning Solar Lights
It’s essential to prepare a few basic tools and set aside at least 30 minutes per solar light for the cleaning process.
The materials you will need include:
- A Phillips screwdriver
- A soft cloth or a few paper towels
- A soft brush
- Dish soap
- Fine-grit sandpaper
Please consider that having the user manual of your solar lights handy can make the cleaning task simpler. This is especially practical if it is your first time disassembling and reassembling solar-powered lights.
How to Clean Solar Lights
After preparing the materials needed for cleaning your solar lights, here is the step-by-step guide on how you can start the cleaning process:
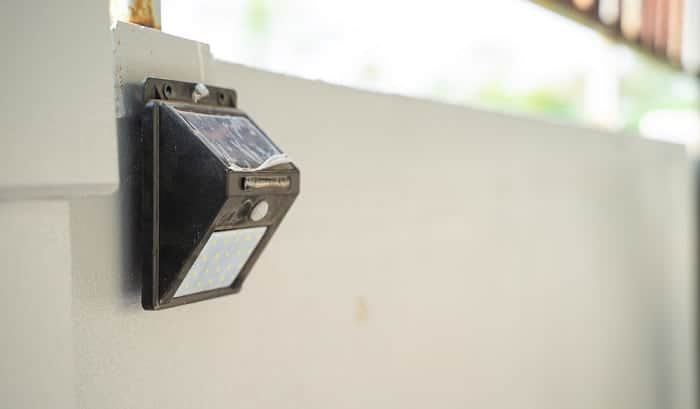
Step 1. Tidying the Solar Panel
Luckily, tidying the solar panels is fast and straightforward. You only need to brush off any loose residues using a slightly soaked cloth or paper towel. From there, gently wipe the surface of the solar panel to get rid of any dirt buildup.
You may use a small amount of dish soap on the panel’s surface and use a wet cloth to eliminate the cloudiness. When you’re done, you may use a clean and slightly drenched cloth to get rid of any soap residue.
Step 2. Cleaning the Batteries
To clean the batteries, check for battery corrosion. You can identify battery corrosion as a white powder that collects on the metal surface.
So, if you observe this on the battery, you should remove it from the casing at once and brush it off using a soft-bristled brush. Typically, you won’t have a hard time removing the white powder since it comes off quickly.
However, if corrosion is more challenging to get rid of, consider using fine-grit sandpaper to eliminate it. Likewise, it’s necessary to clean the casing of the battery using the same process. See to it that the casing is dry before you put the battery back inside the solar light to inhibit corrosion.
Step 3. Cleaning the Solar Light’s Cover
Are you dealing with yellowed plastic solar lights? Nearly all solar lights come with a plastic or glass covering that safeguards the LED lights from different elements outdoors. Dust or debris could accumulate on the inside or the surface due to exposure to outdoor elements over time.
Solar lights installed in climates with plenty of thunderstorms and heavy rains require more maintenance than those installed in drier climates. The glass or plastic casing can be tidied using the same method you used for cleaning the solar panel covering.
Again, you will need to use a soft cloth or paper towels when getting rid of the dirt and other forms of contaminants when cleaning the light’s cover.
Step 4. Final Steps in Cleaning the Solar Lights
After you have finished cleaning all the parts of the solar lights, you also need to ensure that everything is dry before you put the parts back together again. Trapped moisture inside the solar-powered lights will bring about issues and will call for further maintenance.
To avoid these issues, consider using the user manual when reassembling the components of the solar lights. In doing so, you can ensure that everything is put back correctly.
Meanwhile, for an easier and budget-friendly way of cleaning solar lights, you might want to watch this video
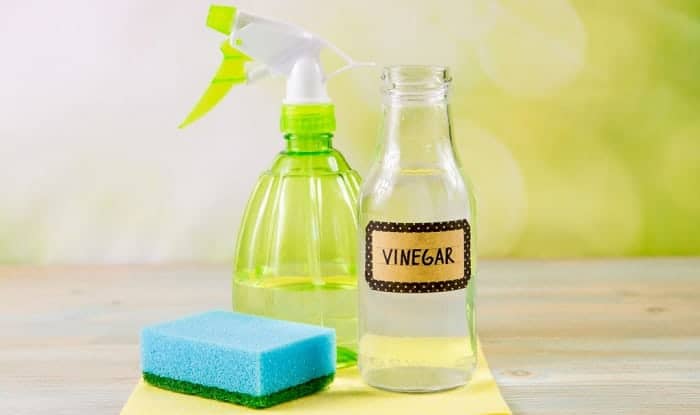
Cleaning Solar Lights with Vinegar
There is an alternative for solar product users dealing with issues concerning oxidation on solar lights. To eliminate severe residues and dirt, you may use vinegar in cleaning your solar-powered lights.
Vinegar is indeed a natural product that is powerful in cleaning any metal and crystal materials. You can clean your solar panels with vinegar by mixing ½ teaspoon liquid non-abrasive detergent or soap, ¼ cup of vinegar, and 2 cups of water placed in a spray bottle.
All you need is to combine those things to make the vinegar solution more effective in cleaning the solar panels. The delightful news is that vinegar will minimize unsightly dirt and materials from the surface.
When vinegar is mixed with water, it will work as a chemical and eliminate all the dirt from the solar panels. This method will assist you in maintaining the cleanliness of your solar panels. In addition, you may add some detergent with vinegar to ensure more cleaning power.
Is Regular Cleaning and Maintenance for Solar Lights Essential
In general, your solar-powered lights are exposed to various elements in the environment, so regular cleaning and maintenance can ensure that they can continue to serve their purpose excellently.
Solar lights will become dusty since they’re mainly used outdoors, and over time, they will collect dirt and residues that will minimize their capability to acquire sufficient sunlight. In particular, solar path lights require more maintenance; otherwise, they might not generate adequate lighting at night or not generate any light at all.
In this scenario, it’s commonly possible to fix these issues with a bit of maintenance, and the step-by-step guide above will help you clean your solar-powered lights, which should keep them working sleekly.
Undeniably, regular cleaning and maintenance could be beneficial to prolong your solar lights’ lifespan and lessen the time required before they call for replacement.
Additional Steps to Take to Reduce Solar Lights Maintenance
You can lessen the amount of maintenance needed on your solar lights by considering a few steps. If the solar-powered light is still not working after getting rid of the battery corrosion and battery casing, it’ll be required to replace your battery.
To ensure that you have the correct battery replacements, bring your old battery to a local hardware store or search online. Keep in mind that solar batteries generally require replacement every two years due to repetitive use.
When buying new solar-powered lights, applying clear nail polish or clear lacquer to the protective plastic surface that covers the solar panel is beneficial. It is a must to put painter’s tape surrounding the cover to avert coating other areas.
This method is advantageous in safeguarding the cover from any damage from the sun’s UV light, which could prolong the solar panel’s lifespan. Alternatively, you may use a 3M-brand transparent paint protection film.
Lastly, please make it a habit to check that water has not accumulated inside your solar-powered lights after heavy downpours. Frequent inspection can help you prevent any damage to your solar lights. If you regularly clean and maintain your solar lights, they are sure to last an extended period and will perform at a maximum level.
What Do You Need to Clean and Maintain When Installing Solar Lights
The following are the main components that especially necessitate regular cleaning and a small amount of maintenance:
- Batteries
Similar to other types of electronics, solar-powered lights tend to malfunction if they’re not protected from humid conditions. This is why it’s essential to keep them in a cool and dry area when not in use.
As you might already know, moisture can accumulate inside the electronics, mainly if left in a damp spot. What’s more, heavy downpours can cause the batteries and wires to corrode. There’s no denying that solar-powered lights are built with weatherproof capabilities; however, moisture brought about by rainfall can collect inside the casing of the solar light.
Hence, it’s strongly suggested to inspect the battery inside the solar-powered light to ensure that your solar light works continuously without any issue.
It would help if you inspected your batteries at least once every three months. Nevertheless, if you install your solar lights in locations with lots of rainfall and humid climate, it’s best to check the batteries more frequently.
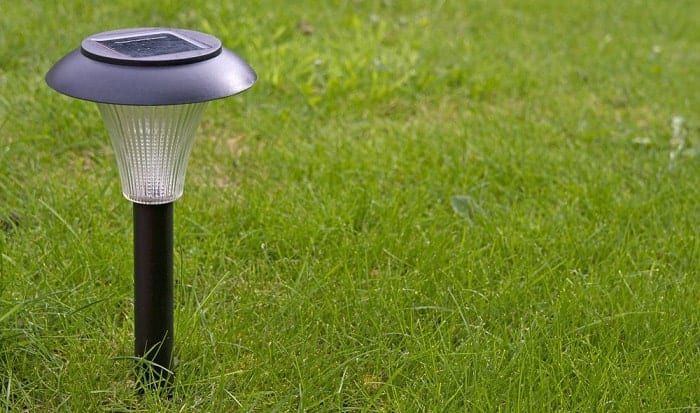
- Solar Panels
In general, the solar panels are situated on the top section of the solar-powered lights. The panels are utilized to accumulate solar power to store in the battery for night lighting.
As time passes by, the protective plastic on top of the solar panels becomes foggy. As a result, this restricts the amount of energy obtained and reduces the amount of night lighting.
Hence, if you don’t clean the panels regularly, the solar-powered lights are more likely to stop functioning correctly. This does not necessarily mean that the panels are damaged, but instead, this indicates that they already require cleaning.
Solar panels should be inspected roughly once a month to ensure that they acquire sufficient light during daylight.
- Solar Light’s Cover
Solar-powered lights also include glass or plastic that shields the lights from various elements present in the environment. In the long run, they become foggy too, and as a result, minimizing the amount of light generated at dusk.
Be sure that the solar light’s cover is transparent as necessary. Inspect to see if it provides adequate lighting to satisfy your lighting requirements.
Conclusion
Similar to what was written in this post, you can keep your solar lights clean and in excellent working condition with regular cleaning and maintenance. Making it a habit to inspect your solar lights for any signs of dirt accumulation, corrosion, and damage can certainly prolong their longevity.
Solar lights are worthwhile investments, for they are eco-friendly, energy-efficient, and money-saving. Fortunately, the entire cleaning process isn’t complicated and time-consuming. Hopefully, by following the cleaning methods we have shared above, you can continue to enjoy the benefits that your solar lights bring.
Did you enjoy reading the step-by-step guide on how to clean solar lights? Please feel free to share this article.

I am Kathleen Miller, staff writer and reviewer of the Avasolar team. Working with the team has been a pleasure for me so far, I hope to bring readers useful information by creating detailed and easy-to-follow contents.